Introduction to SSH#
SSH (Secure Shell) is a tool used to safely connect to remote computers and servers. It encrypts data, keeping your connection secure from hackers. Developers and system administrators use SSH for tasks like remote access, file transfers, and running commands on distant systems.
Advantages of SSH#
Secure Communication – Encrypts data, preventing eavesdropping and attacks.
Remote Access – Manage servers and systems from anywhere.
Key-Based Authentication – Enables password-free and more secure logins.
Secure File Transfers – Transfer files safely
Multi-User Support – Allow multiple users to connect and manage a system securely.
SSH makes remote access fast, safe, and hassle-free!
Connection With Remote System#
SSH (Secure Shell) allows secure remote access to a server or another computer. Here’s how you can set it up and use it on Ubuntu:
1. Prepare Ubuntu#
The first thing you need to do before you start installing SSH on Ubuntu is to update all apt packages to the latest versions. To do this, use the following command:
sudo apt update && sudo apt upgrade2. Install SSH on Ubuntu#
First, ensure SSH is installed on both the client (your local machine) and the server (remote machine).
On the server (remote machine), install the SSH server: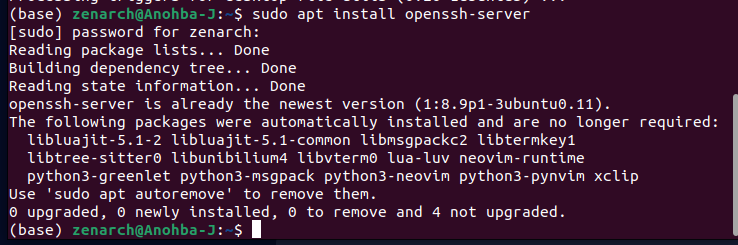
Note: For this type of connection, both the client (local system) and the server (remote system) should be on the same network.
To check if SSH is running: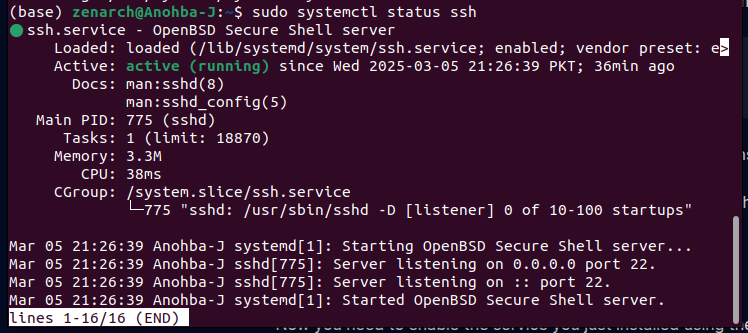
If it’s not running, start it with:
sudo systemctl start ssh2. Allow SSH Through the Firewall#
If you have a firewall enabled, allow SSH connections:
Then, enable the firewall if it’s not already active:
3. Find the Server’s IP Address#
To connect to your server, you need its IP address. Run:
ip aIP is usually something like 192.168.x.x.
4. Connect to the Server via SSH#
On your client machine, use this command to connect:
Note: As it is a connection with remote system, you need to add the user name and IP-address of system with which you are building connection.
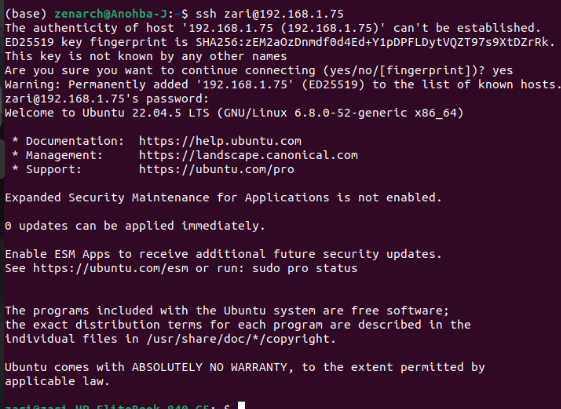
Enter the password when prompted ( remember it is the password connection. For this type of SSH you need to know to password of remote system)>
You have now successfully built a connection with remote system through password!
Set Up Passwordless SSH (Optional But Recommended)#
If you don’t want to enter a password every time, set up SSH key authentication:
🔹 Generate an SSH Key (Skip if you already have one)#
On your local machine, run:
ssh-keygen -t ed25519 -C "SSHkey"Press Enter for all options.
🔹 Copy the SSH Key to the New Remote System#
ssh-copy-id username@remote_IPEnter the password once. After this, SSH should work without a password!
Loopback SSH#
If you want to connect to your own system using SSH (also called loopback SSH or local SSH connection), follow these steps:
Steps:#
Install SSH on Ubuntu
Allow SSH Through the Firewall
Find the Server’s IP Address
Note:In this case, you need the IP-address of your own system.Connect to the Server via SSH
Enter the password when prompted.
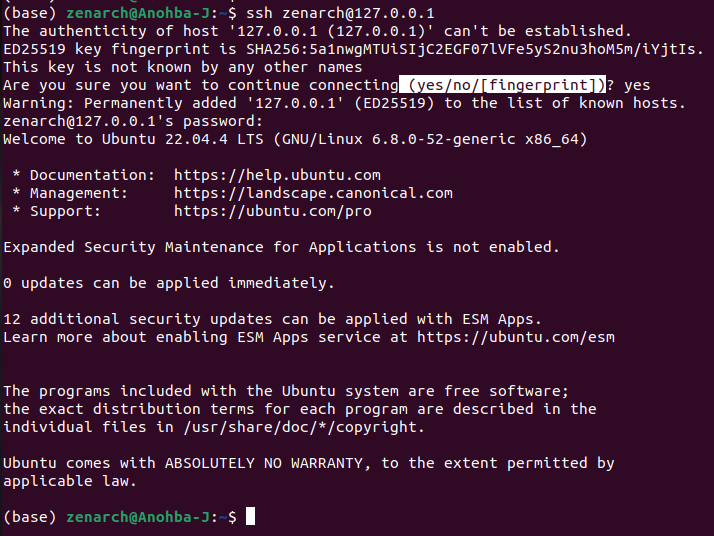
- Disconnect from SSH
To exit the SSH session, type:
exitYou’ve successfully connected to your own system via SSH!
Conclusion#
SSH isn’t just a tool—it’s your secret tunnel into remote (or even your own) system! With a secure setup and a few tweaks, you can connect like a pro. Now go forth and SSH into greatness!🚀