GitHub CLI (Command Line Interface) is a powerful tool that allows developers to interact with GitHub directly from the terminal. Whether you want to create repositories, manage pull requests, or handle issues, GitHub CLI makes the process seamless and efficient.
Why Use GitHub CLI?#
If you’re comfortable with the command line, GitHub CLI eliminates the need to switch between your browser and terminal. It integrates well with Git, making repository management faster and more intuitive. Some benefits include:
Faster workflow – No need to open a browser for basic operations.
Automation – Easily script repetitive tasks.
Seamless Git integration – Work within your existing Git environment.
Improved efficiency – Manage repositories, issues, and pull requests quickly.
1. Installing GitHub CLI#
GitHub CLI supports multiple platforms, including Windows, macOS, and Linux. You can install it via package managers:
MacOS (Using Homebrew)#
brew install ghWindows (Using Scoop)#
scoop install ghOR using Chocolatey:#
choco install ghFor Linux (Debian/Ubuntu-based systems):#
sudo apt updateThen run this command: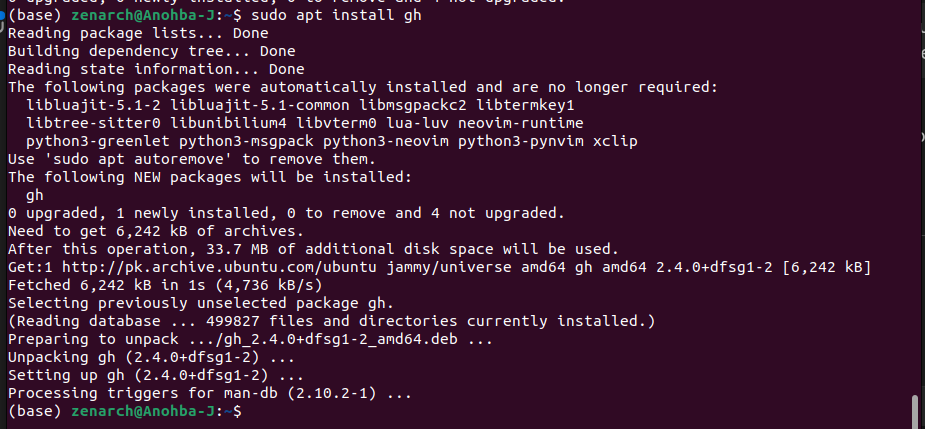
To verify installation:
gh --version2. Authenticating with GitHub CLI#
Before using GitHub CLI, authenticate it with your GitHub account:

You’ll be prompted to select a GitHub account type (GitHub.com or GitHub Enterprise) and a preferred authentication method (HTTPS or SSH). Follow the on-screen instructions to complete authentication. If you plan to use SSH (recommended), make sure you have an SSH key set up:
Check for an existing SSH key

Generate a new SSH key (if missing)
ssh-keygen -t ed25519 -C "your-email@example.com"Then, add your SSH key to GitHub:
gh ssh-key add ~/.ssh/id_ed25519.pubVerify login:

You can also test your SSH connection by running the following command:

3. Creating a GitHub Repository from the Terminal#

Options:#
--public: Makes the repo public.--private: Creates a private repo.--source=.: Uses the current directory as the source for the repository.
Clone an existing repository#
gh repo clone username/repo-nameAdd the SSH Remote Manually(if needed)#
If your repository doesn’t have a remote set up yet. You need to add the SSH remote manually.
🔹 Step 1: Add the Remote Repository (SSH)#
If you’re using SSH, add your GitHub repository as a remote with this command:
git remote add origin git@github.com:zenarchh/OOP.gitNote: Replace OOP(my repo) with your actual repository name if different.
🔹 Step 2: Verify the Remote URL#
Now, check if the remote was added successfully:

This confirms that your Git repository is now connected to GitHub via SSH. ✅
🔹 Step 3: Push Your Code#
If you haven’t pushed your code yet, run:
git push -u origin masteror
git push -u origin main(Use master or main depending on your branch name.)
Now your Git setup is complete with GitHub CLI + SSH! 🚀
🔹 Verify Everything#
Once the push is successful, go to your GitHub repository (github.com/zenarchh/OOP) and check if your files are there.
If Everything Works:#
You’re fully set up with Git + GitHub CLI + SSH! 🚀 From now on, you can commit and push changes without entering a password.
My pushed changes without passcode: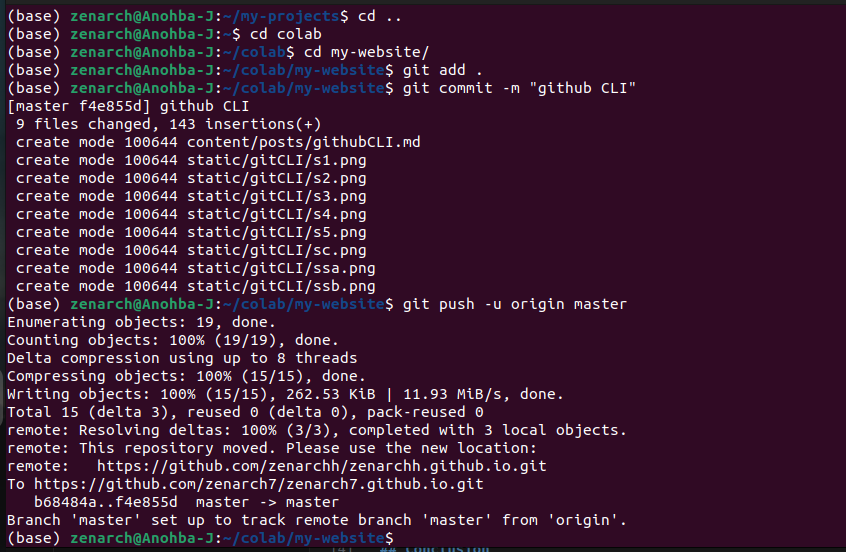
4. Managing Repositories#
View a list of your repositories
gh repo listOpen a repository in the browser
gh repo view --webFork a repository
gh repo fork username/repo-nameConclusion#
GitHub CLI makes working with repositories, issues, and pull requests seamless. By using aliases, SSH authentication, and auto-completion, you can boost your productivity and streamline your GitHub workflow directly from the terminal. 🚀